Bots Raspberry Pi / Jetson EVK
Use this document to help setup and test your IM-01-412 Evaluation Kit for the Raspberry Pi / Jetson platforms.
Kit Contents
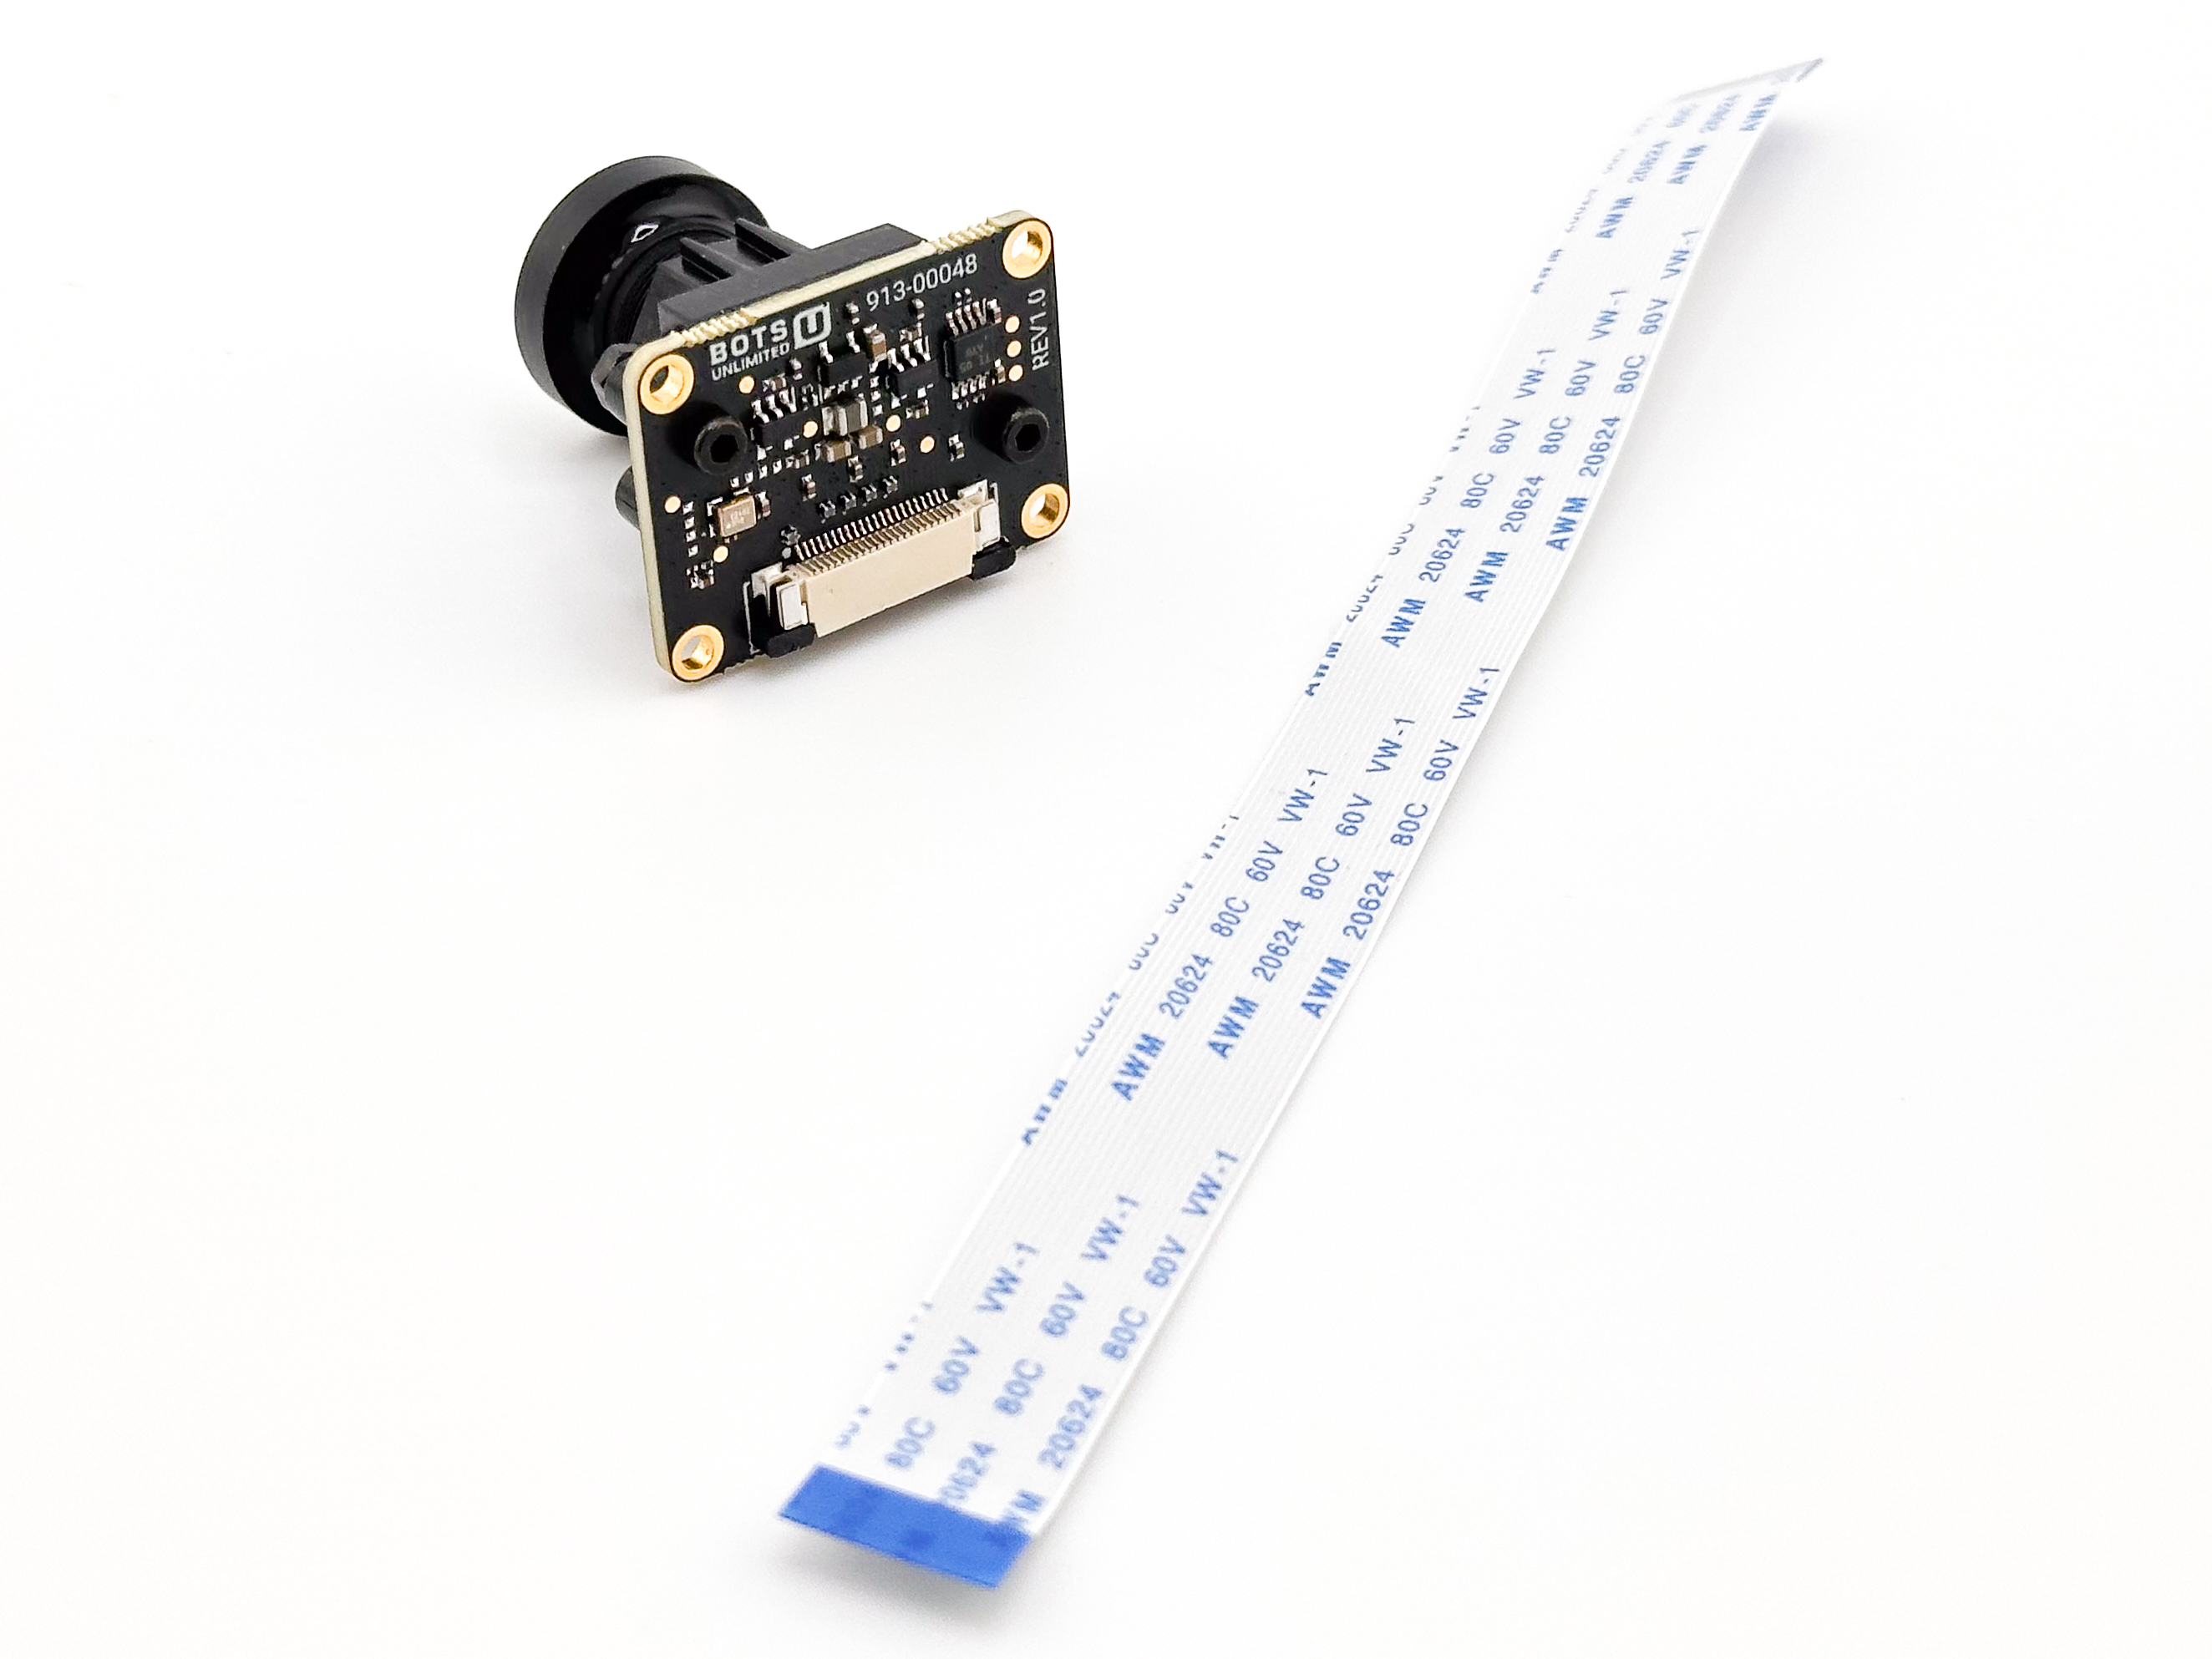
- IM-01-412-RPI - IMX412 Camera Module with Adapter Board Mounted
- 22 pin 0.5mm pitch FFC cable
Supported Hardware (22-pin MIPI CSI-2 Interface)
This adapter board supports platforms that use the 22-pin, 0.5 mm pitch MIPI CSI-2 connector.
Raspberry Pi
- Raspberry Pi Zero
- Raspberry Pi Zero W / WH
- Raspberry Pi Zero 2 W / WH
- Raspberry Pi 5 (dual CSI connectors)
NVIDIA Jetson
- NVIDIA Jetson Orin Nano Developer Kit
- NVIDIA Jetson Orin NX Developer Kit (with compatible carrier board)
- NVIDIA Jetson Xavier NX Developer Kit
Notes
- All supported platforms use a 22-pin, 0.5 mm pitch FFC connector for MIPI CSI-2.
- Lane count and camera interface configuration may vary by platform.
- For Compute Modules (Raspberry Pi CM3/CM4/CM5) and Jetson modules, compatibility depends on the carrier board providing a 22-pin CSI connector.
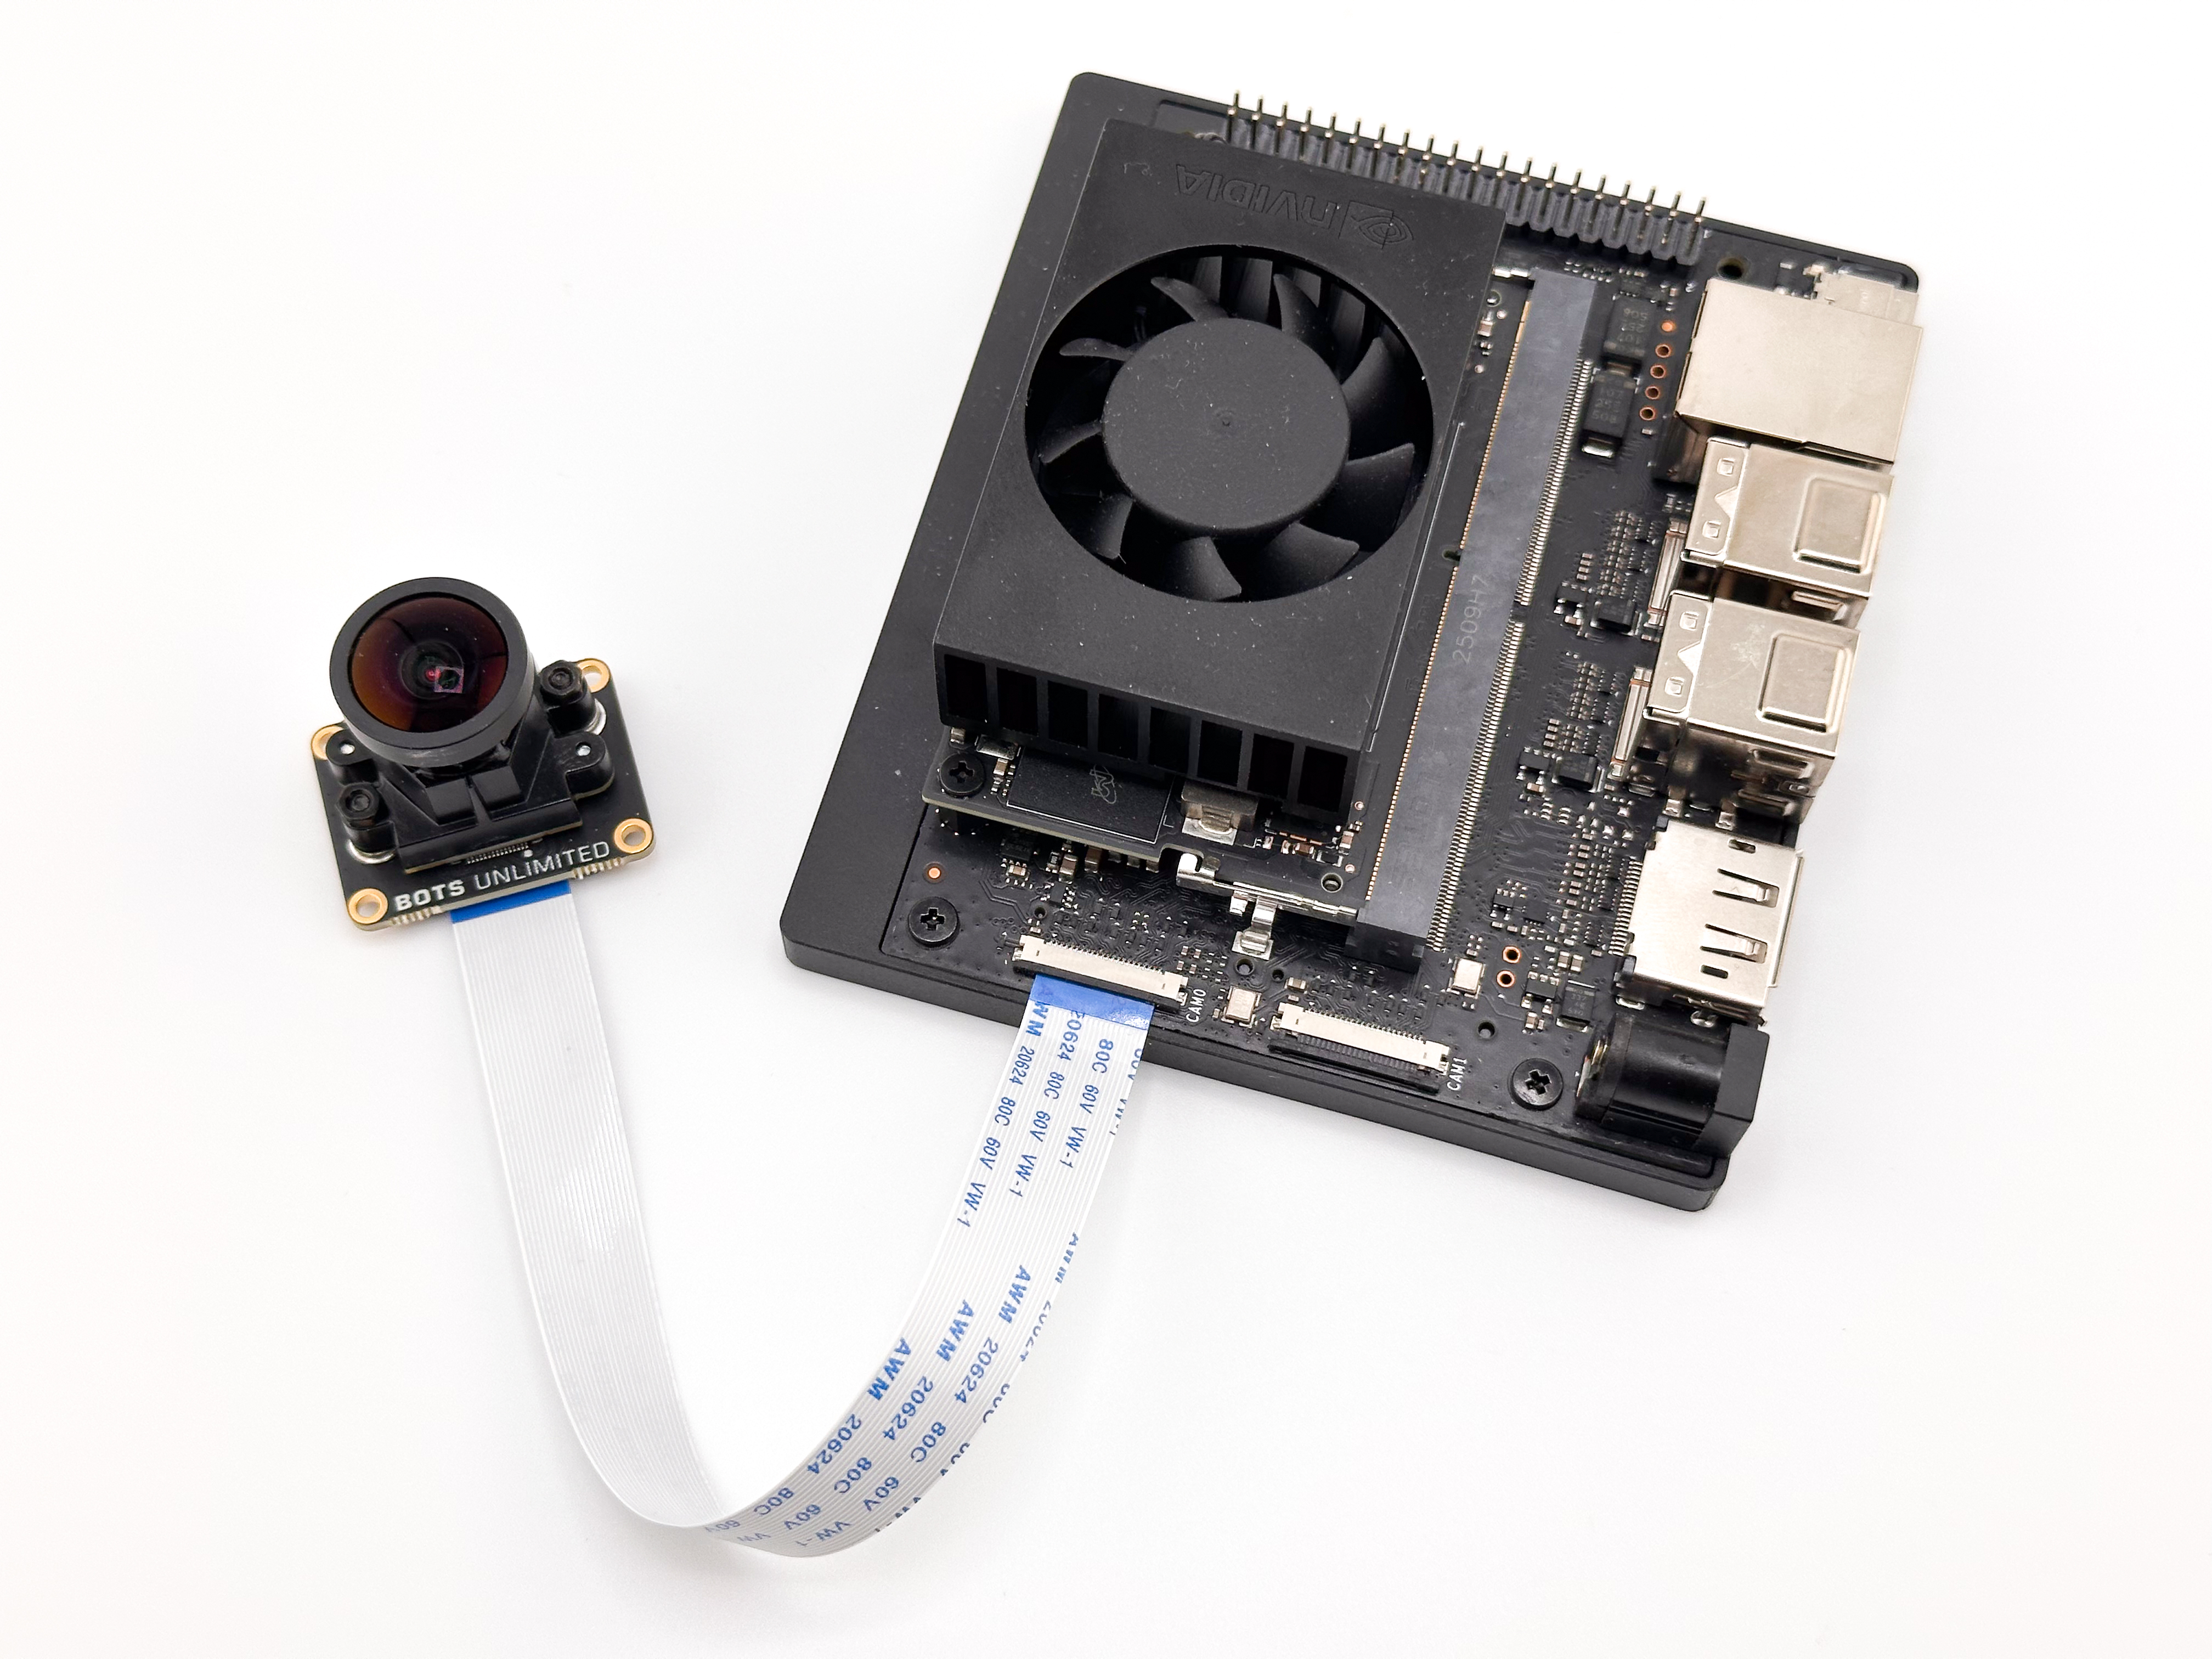
Hardware Quick Start
-
Insert the FFC Cable into the Bots EVK Board
- Make sure the exposed contacts are facing upward as shown in the image below:
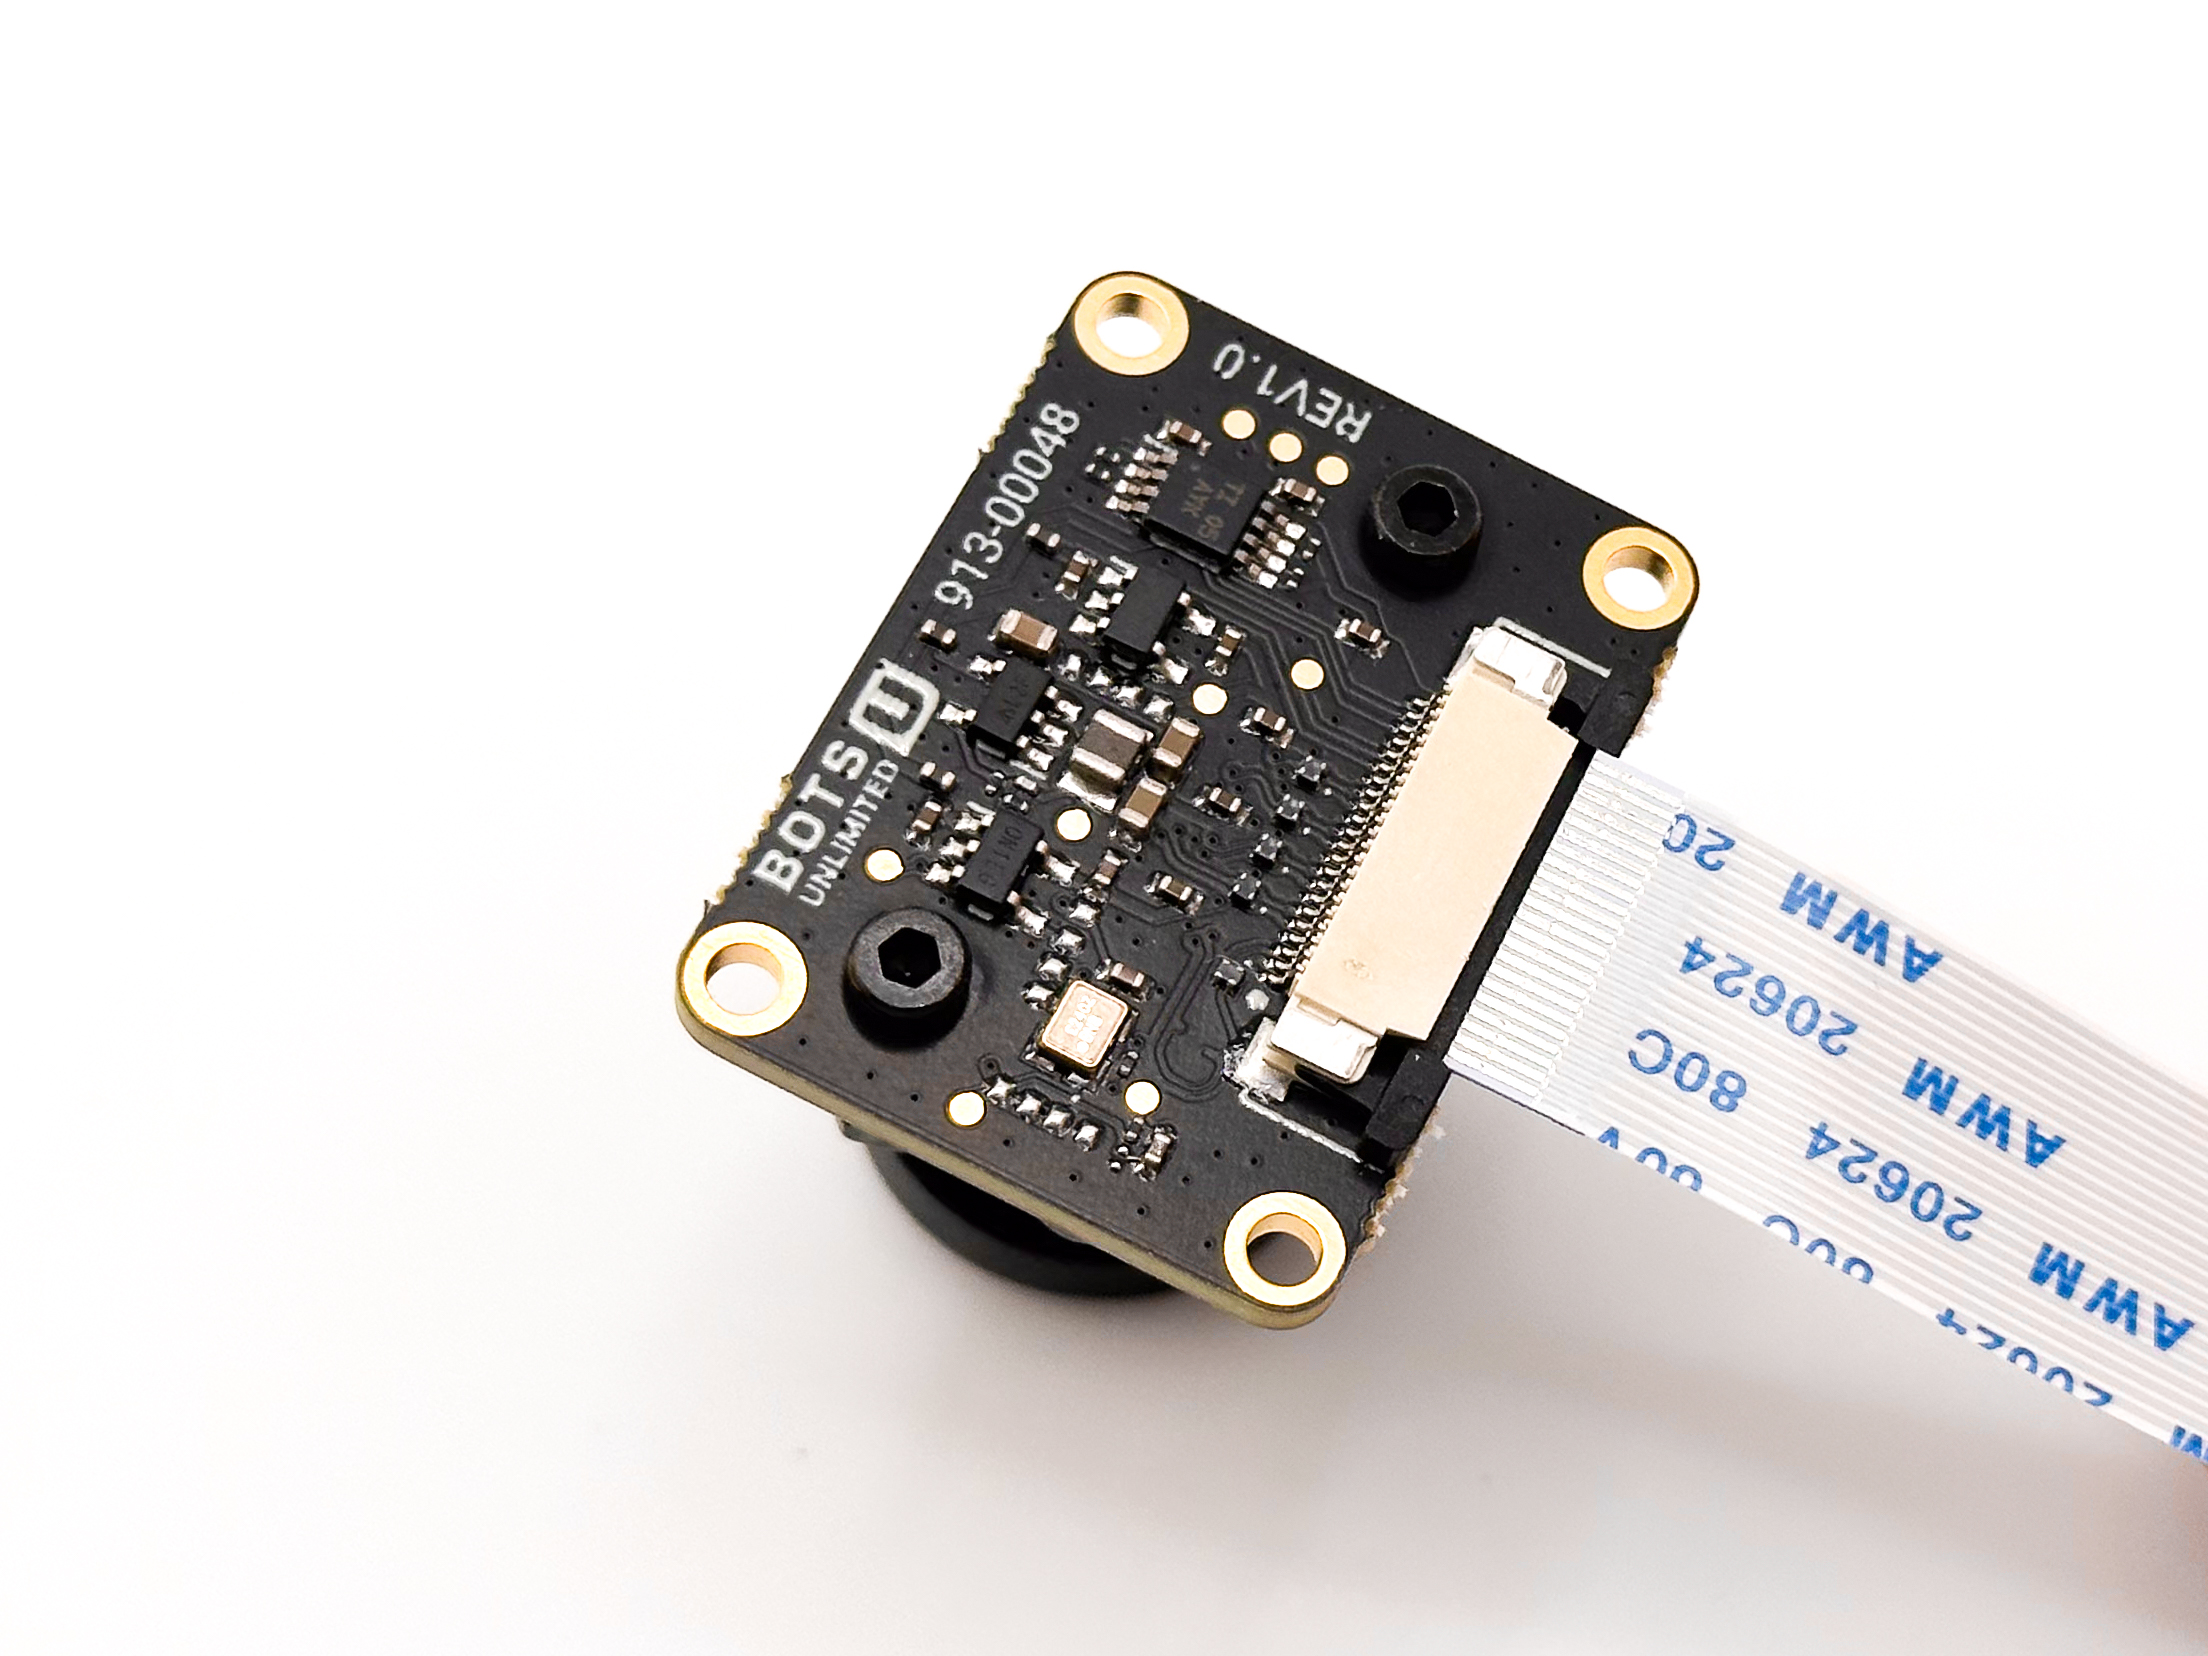
- Make sure the exposed contacts are facing upward as shown in the image below:
-
Make Sure the FFC is Fully Seated as Shown
- The exposed contacts should be even and not at an angle.
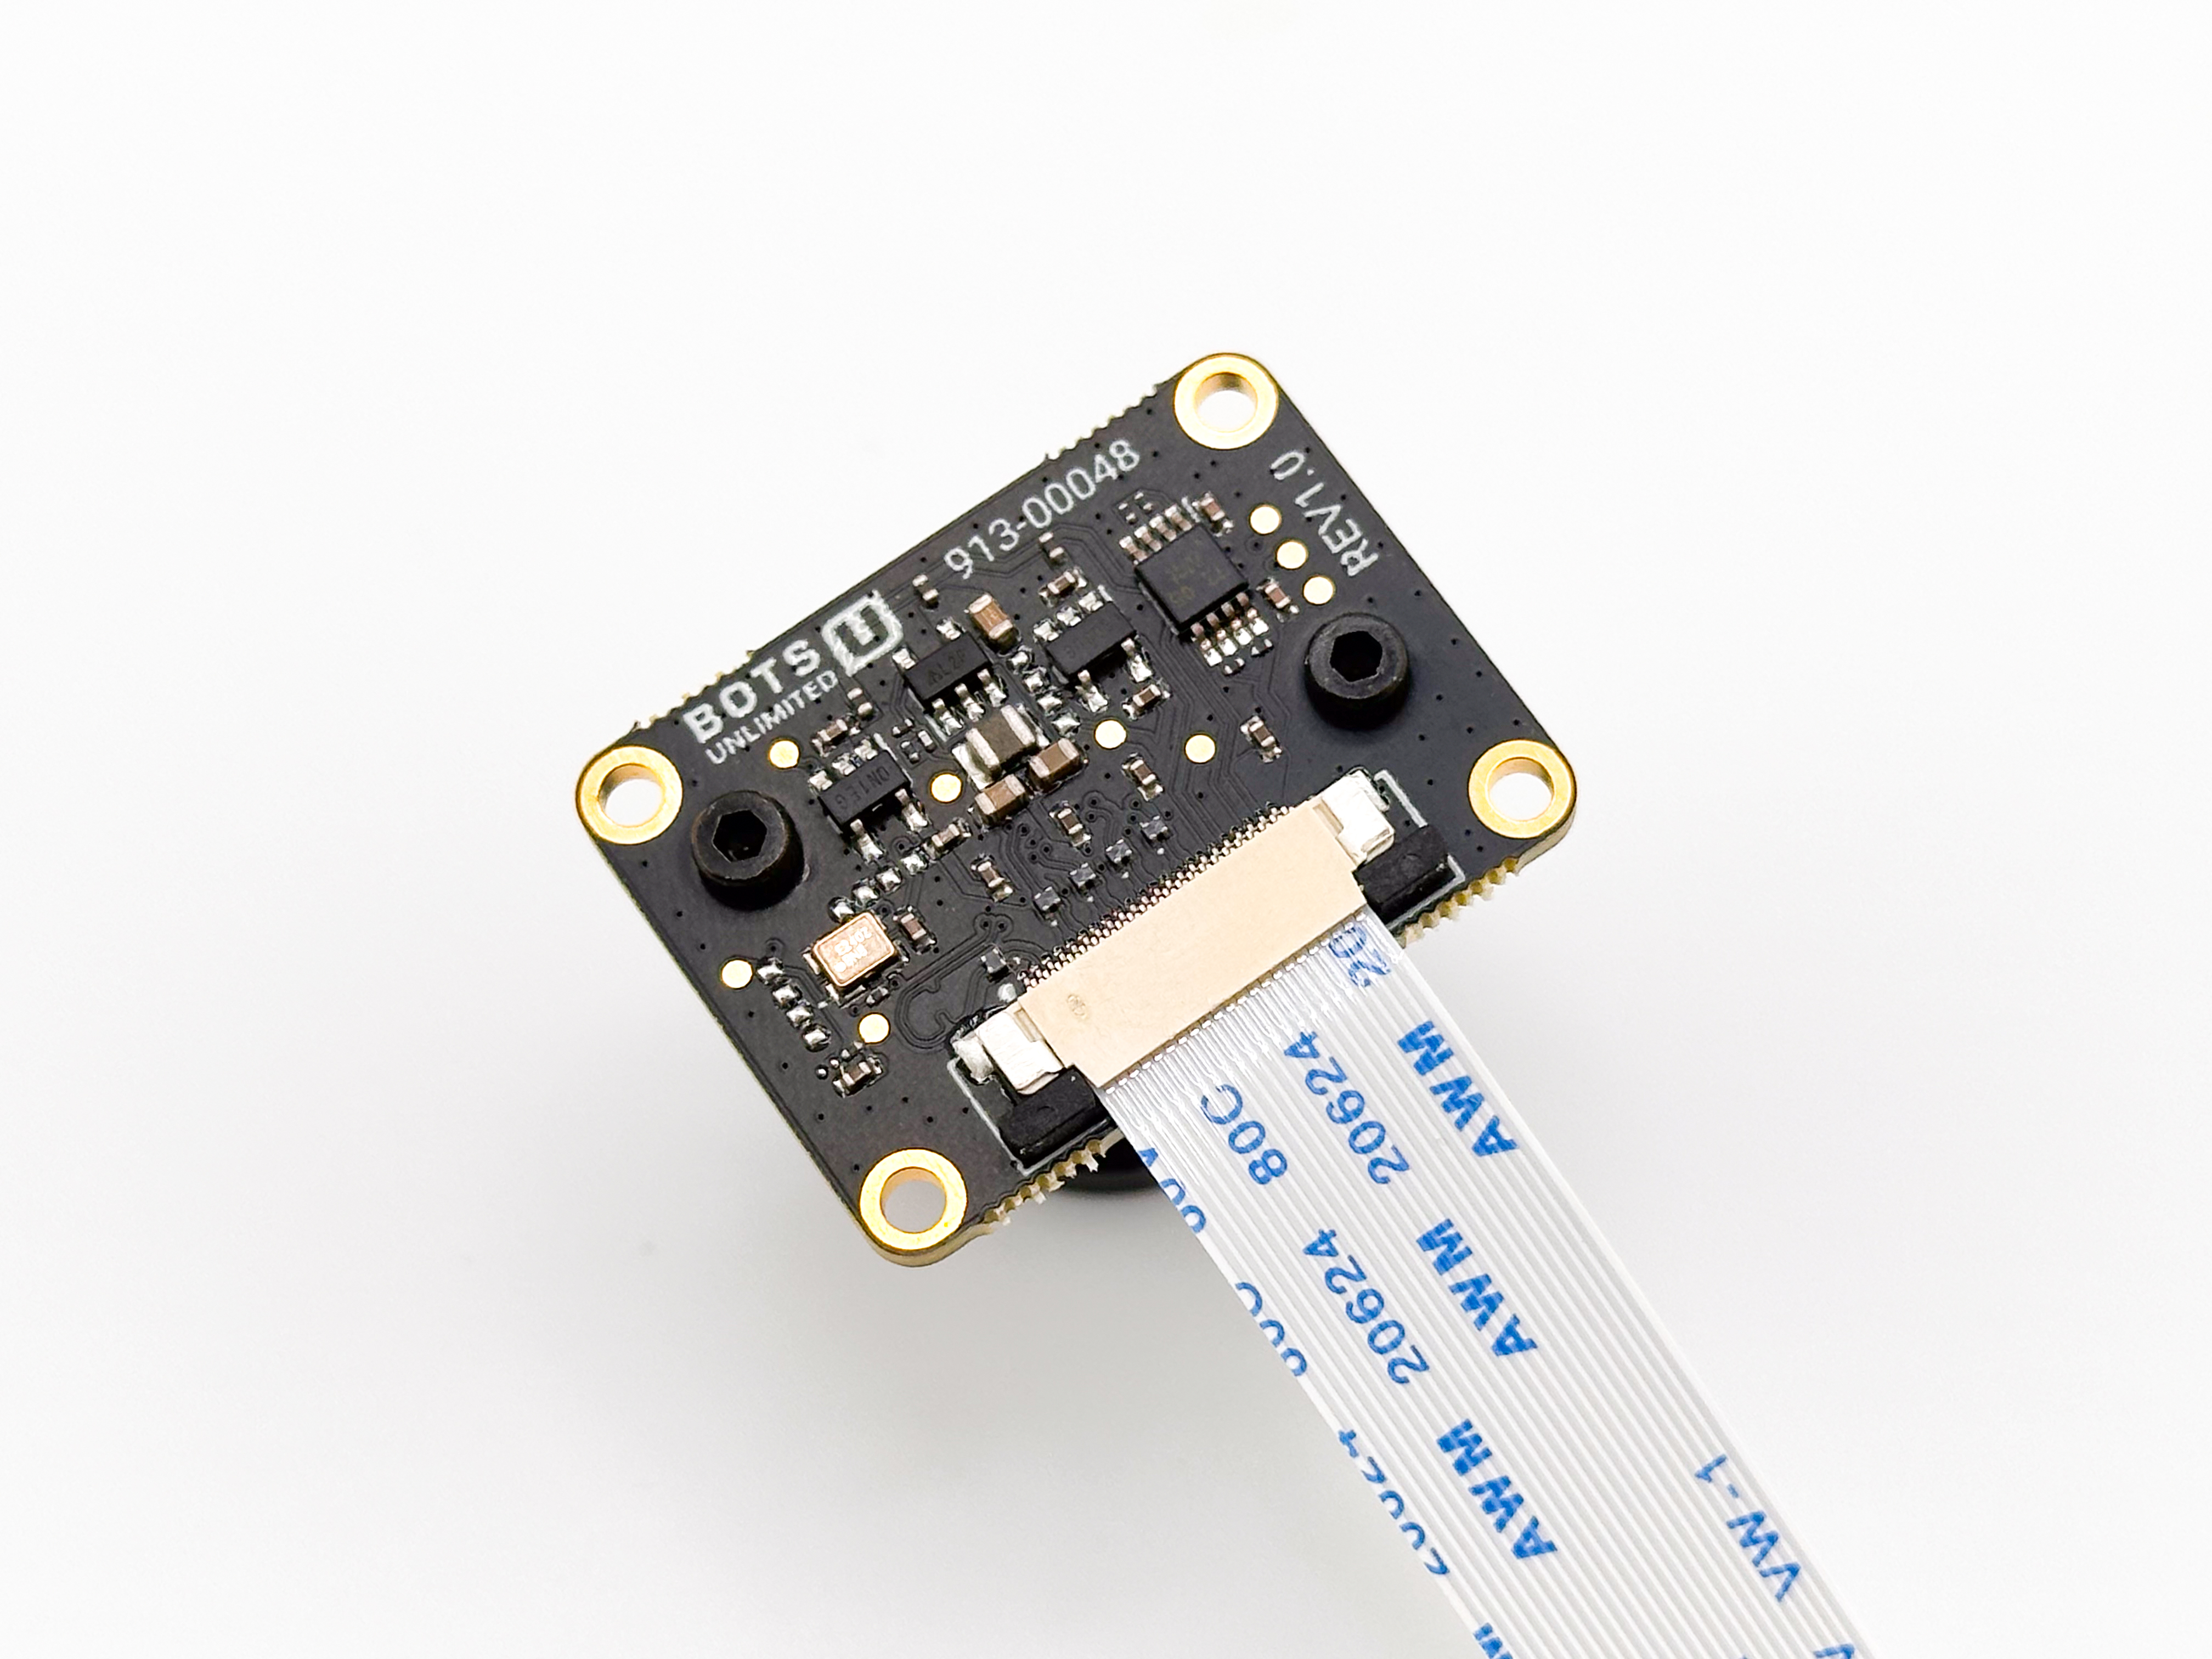
- The exposed contacts should be even and not at an angle.
-
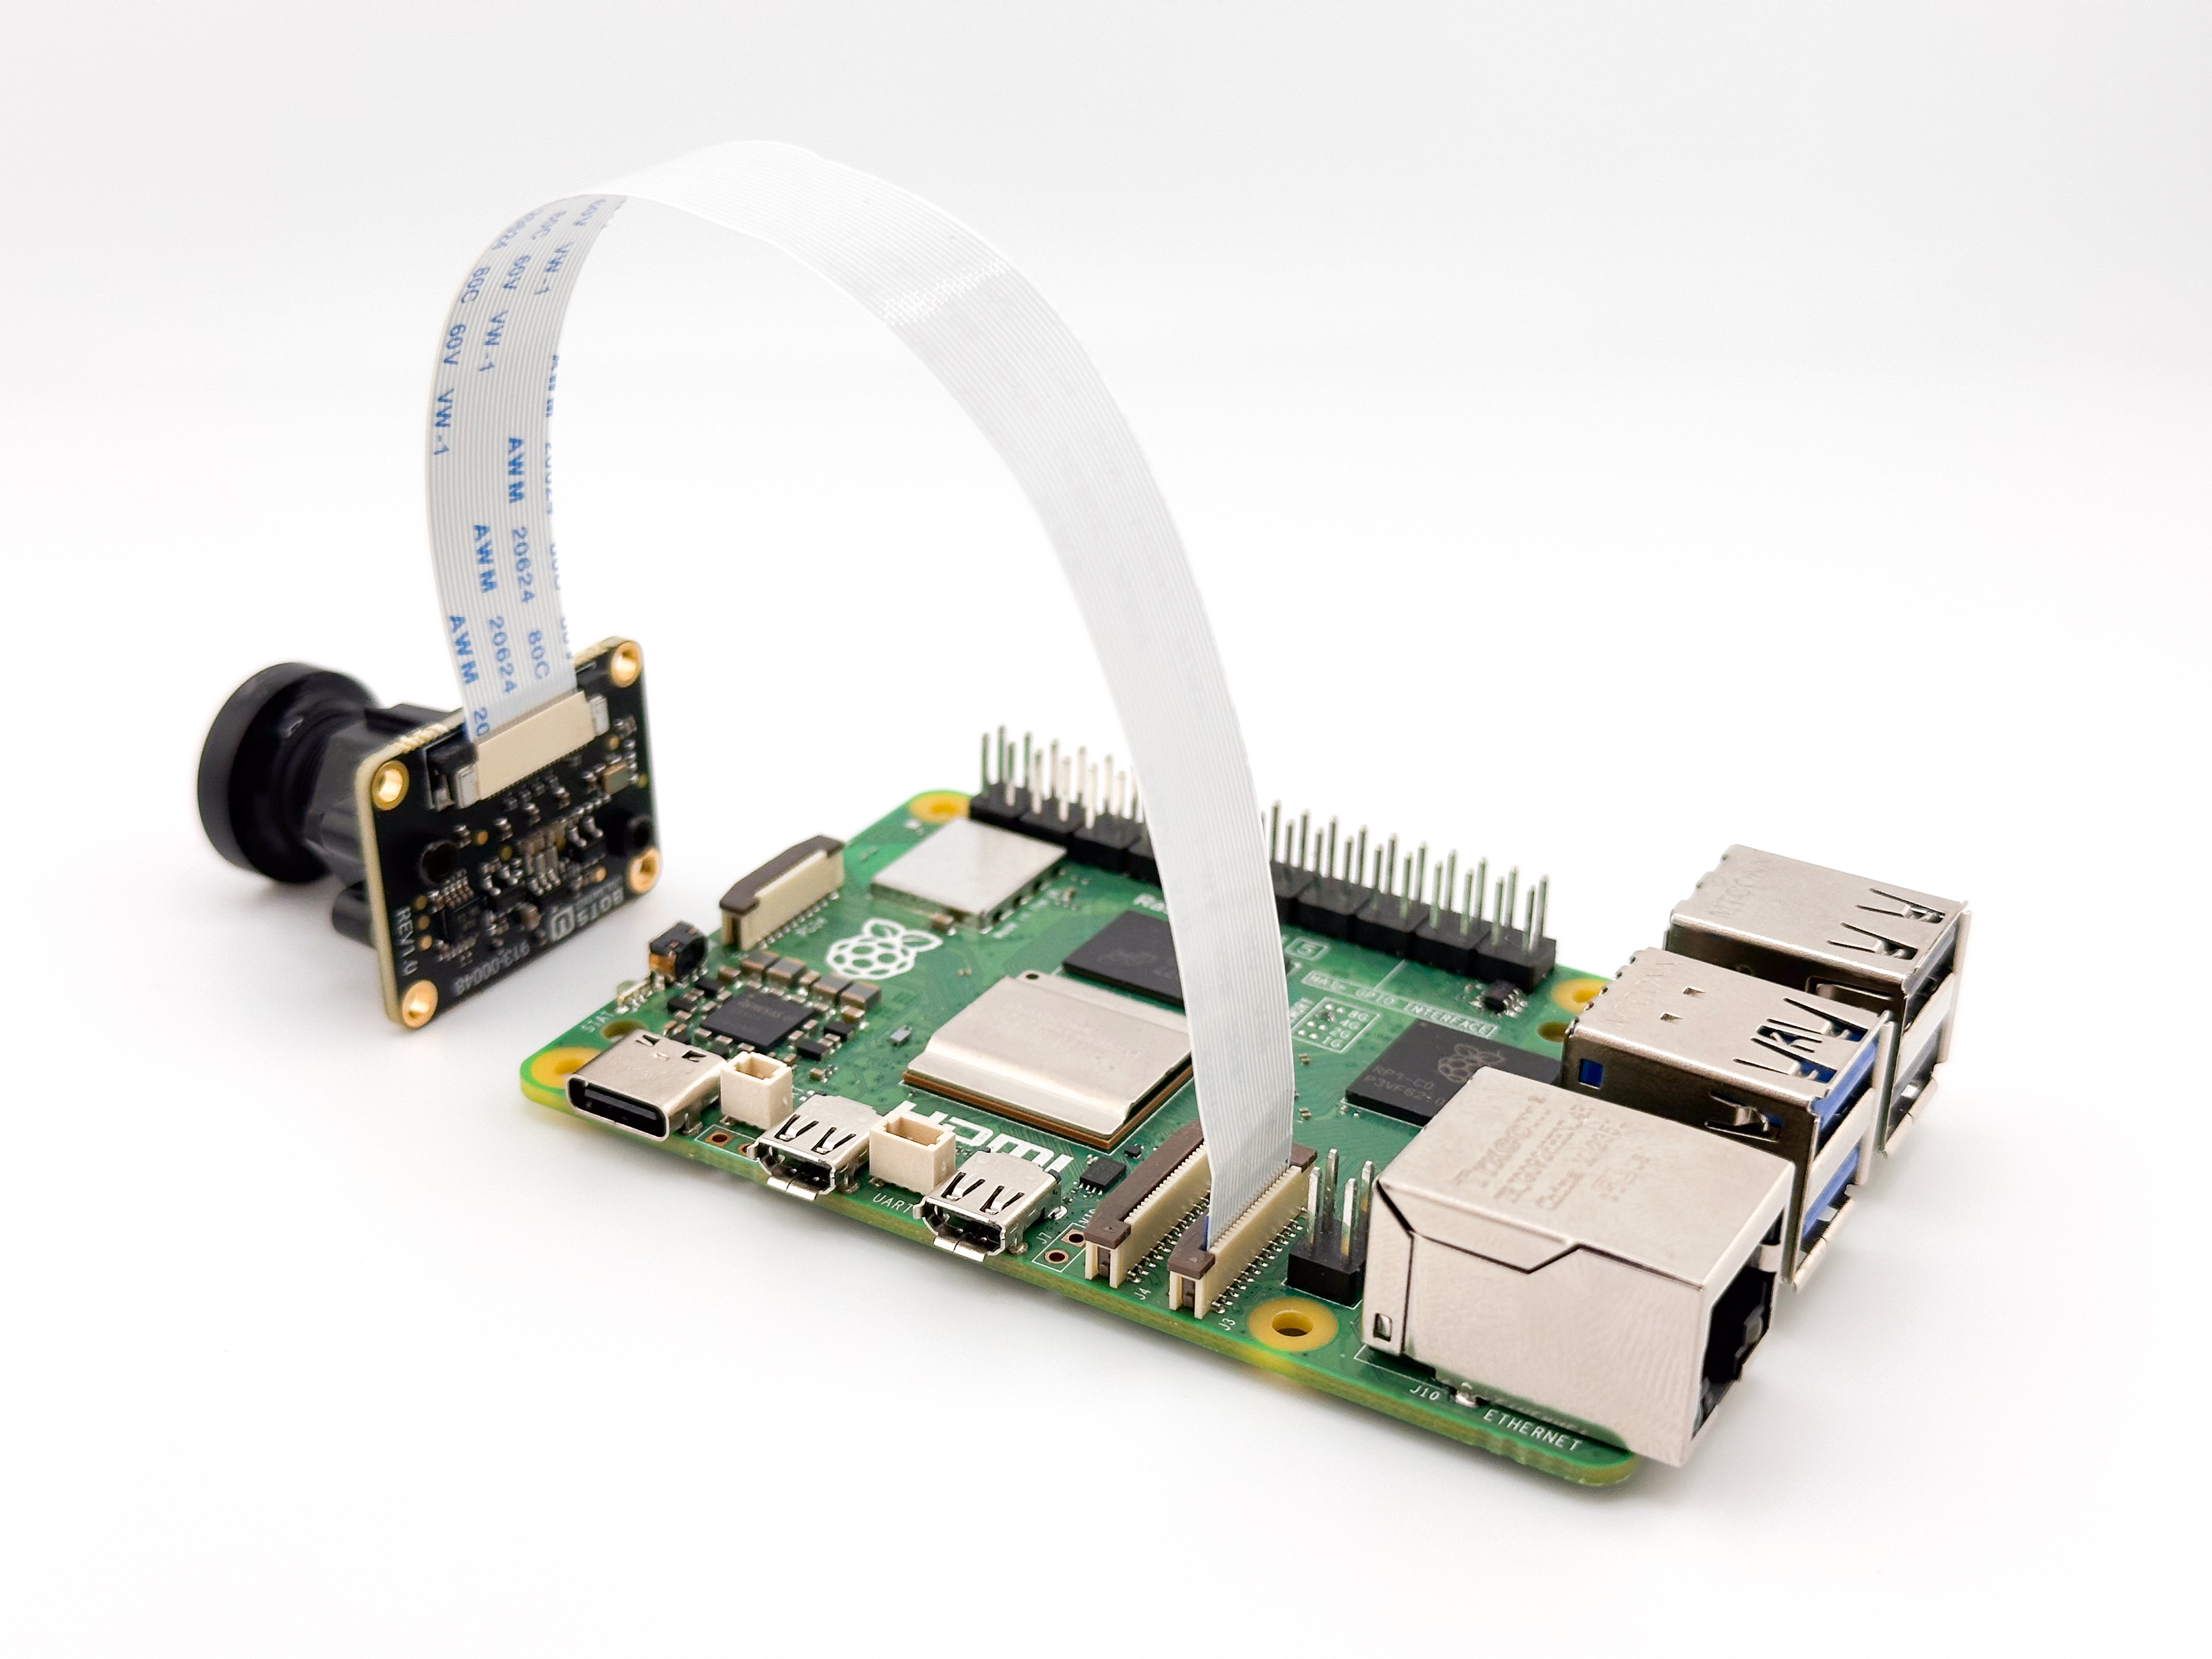
Insert the FFC Cable into the Host Platform
-
For Raspberry Pi, reference the image below:
-
For Jetson, reference the image below:
-
Warning
Please carefully pay attention to the FFC connector orientation and match the images above. Ensure that the FFC is fully seated and not inserted at an angle.
Software & Driver Setup
Please use the following driver for the software setup instructions:
Nvidia
The Nvidia build uses pre-installed/prebuilt l4t packages
If not installed:
sudo apt install nvidia-l4t-display-kernel nvidia-l4t-kernel nvidia-l4t-kernel-dtbs nvidia-l4t-kernel-headers nvidia-l4t-kernel-oot-headers nvidia-l4t-kernel-oot-modules
For GStreamer support, also install:
sudo apt install nvidia-l4t-gstreamer nvidia-l4t-jetson-multimedia-api
Next build the kernel module and dtbo
cd <directory of this README.md>/nvidia
make
sudo make install

# or Manually with the following commands
sudo cp overlay/tegra*.dtbo /boot/.
sudo cp src/imx412.ko /lib/modules/`uname -r`/kernel/drivers/media/i2c/.
sudo cp botsu-imx412.conf /etc/modprobe.d/.
sudo depmod -a
Next, run:
sudo /opt/nvidia/jetson-io/jetson-io.py
To test on the jetson with GStreamer
gst-launch-1.0 -e nvarguscamerasrc ! 'video/x-raw(memory:NVMM),format=NV12,width=1920,height=1080,framerate=60/1' ! nveglglessink
# or
gst-launch-1.0 -e nvarguscamerasrc ! 'video/x-raw(memory:NVMM),format=NV12,width=3840,height=2160,framerate=30/1' ! nveglglessink
Pi5
Note: Earlier versions of Pi hardware are not fully released yet.
For Pi, insure the kernel headers package is installed, it is normally installed by default.
Build the kernel module and dtbo
cd <directory of this README.md>/pi
make
sudo make install
Once installed, the driver must be activated in the pi config file, edit, as root /boot/firmware/config.txt Set the automatic load overlays to false and add the section for the camera installed
# Automatically load overlays for detected cameras
camera_auto_detect=0

# imx412 camera in CAM0 location
dtoverlay=imx412,cam0,4lane,always-on
dtparam=i2c_csi_dsi0=on

# imx412 camera in CAM1 location
dtoverlay=imx412,4lane,always-on
dtparam=i2c_csi_dsi1=on
GStreamer support:
sudo apt install gstreamer1.0-tools gstreamer1.0-plugins-ugly gstreamer1.0-libcamera
libcamera support: Stock libcamera does not support the imx412, it needs to be patched
# Following the libcamera/README.rst instructions from here

sudo apt install -y libboost-dev
sudo apt install -y libgnutls28-dev openssl libtiff-dev pybind11-dev
sudo apt install -y qtbase5-dev libqt5core5a libqt5widgets5
sudo apt install -y meson cmake ninja-build
sudo apt install -y python3-yaml python3-ply
sudo apt install -y libglib2.0-dev libgstreamer-plugins-base1.0-dev

# The following are recommeded/optional
sudo apt install -y libyaml-dev python3-yaml python3-ply python3-jinja2
sudo apt install -y libgnutls28-dev libssl-dev openssl
sudo apt install -y doxygen graphviz python3-sphinx python3-sphinx-book-theme python3-sphinxcontrib.doxylink texlive-latex-extra
sudo apt install -y libgstreamer1.0-dev libgstreamer-plugins-base1.0-dev
sudo apt install -y libpython3-dev pybind11-dev
sudo apt install -y libdrm-dev libjpeg-dev libsdl2-dev libtiff-dev

# Clone the libcamera project
git clone https://github.com/raspberrypi/libcamera.git
cd libcamera
git apply <directory of this README.md>/pi/patches/0001-Add-imx412-support-to-libcamera.patch

# Now build the app/libraries
meson setup build --buildtype=release -Dgstreamer=enabled -Dpycamera=enabled
ninja -C build
sudo ninja -C build install
sudo ldconfig
cd -
To rebuild the rpicam-apps per the libcamera recomendations:
# Libcamera packages above need to be also installed.
sudo apt install -y libcamera-dev libepoxy-dev libjpeg-dev libtiff5-dev libpng-dev libopencv-dev
sudo apt install -y qtbase5-dev libqt5core5a libqt5gui5 libqt5widgets5
sudo apt install -y libavcodec-dev libavdevice-dev libavformat-dev libswresample-dev
sudo apt install -y python3-pip git python3-jinja2
sudo apt install -y libboost-program-options-dev libdrm-dev libexif-dev

git clone https://github.com/raspberrypi/rpicam-apps.git
cd rpicam-apps


meson setup build -Denable_libav=enabled -Denable_drm=enabled -Denable_egl=enabled -Denable_qt=enabled -Denable_opencv=disabled -Denable_tflite=disabled -Denable_hailo=disabled

# or headless
meson setup build -Denable_libav=disabled -Denable_drm=enabled -Denable_egl=disabled -Denable_qt=disabled -Denable_opencv=disabled -Denable_tflite=disabled -Denable_hailo=disabled

# build and install
meson compile -C build
sudo meson install -C build
sudo ldconfig
# see https://www.raspberrypi.com/documentation/computers/camera_software.html#building-libcamera-and-rpicam-apps for more options


cd -
To test on the Pi
Display on screen for 60 seconds using rpicam apps
rpicam-vid -t 60000
Stream to host 172.16.2.16
gst-launch-1.0 -v libcamerasrc ! video/x-raw,width=1280,height=1080,format=NV12,framerate=26/1 ! x264enc tune=zerolatency ! h264parse config-interval=1 ! rtph264pay pt=96 ! udpsink port=5500 host=172.16.2.16 sync=false
Let’s build boldly —
The Bots Unlimited Team